Part 3: Structuring Content Types and Sections to the Headless CMS
Now that you have created your cms folder and have an overall understanding of how you'll use it, let's learn how to structure the Content Type and Section files so you can create any integrations you desire.
Step by step
Step 1 - Automatically syncing your changes
- Before we start creating more complex definitions of Content Types and Sections, go to the root of your FastStore project and run
yarn devcommand to enable the watch mode for the FastStore CLI. Remember to use a development workspace.
This command will monitor any changes in the project, including the new section you have created, and automatically merge it with the default sections available in faststore/core.
-
Open another terminal and run
faststore cms-syncto automatically sync your changes in thecmsfolder with the Headless CMS app. -
Open the VTEX Admin, access Storefront > Headless CMS and keep it next to your code to see your changes while editing the
cmsfolder. Refreshing the Admin may be necessary to see your changes.
Step 2 - Adding Content Types to the Headless CMS
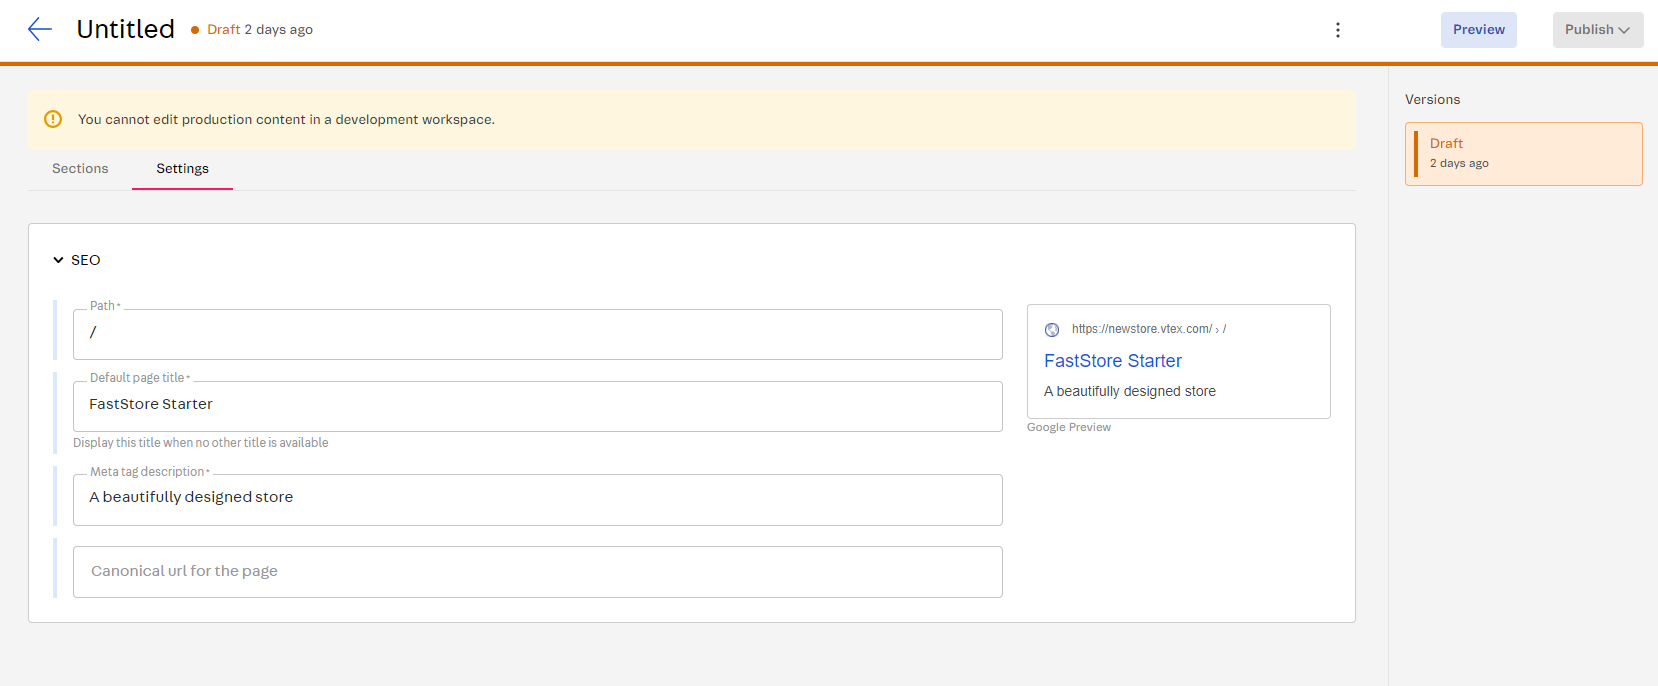
The content-types.json file is an array of JSON objects that describes the types of pages available for customization at the Headless CMS. Therefore, to create new Content Types, we need to declare a new JSON object for each of our Content Types in the content-types.json file. However, we still need to discover which props these objects expect. So let's get back to our previous example.
[
   {
    "id": "customPage",
    "name": "Custom Page",
    "configurationSchemaSets": [
      {
        "name": "Settings",
        "configurations": [
          {
            "name": "seo",
            "schema": {
              "title": "Settings",
              "description": "Search Engine Optimization options",
              "type": "object",
              "widget": {
                "ui:ObjectFieldTemplate": "GoogleSeoPreview"
              },
              "required": [
                "slug",
                "title",
                "description"
              ],
              "properties": {
                "slug": {
                  "title": "Path",
                  "type": "string",
                  "default": "/"
                },
                "title": {
                  "title": "Default page title",
                  "description": "Display this title when no other title is available",
                  "type": "string",
                  "default": "FastStore Starter"
                },
                "description": {
                  "title": "Meta tag description",
                  "type": "string",
                  "default": "A beautifully designed store"
                },
                "canonical": {
                  "title": "Canonical url for the page",
                  "type": "string"
                }
              }
            }
          }
        ]
      }
    ]
  }
]
Notice that, to declare a new Content Type, you must specify at least the following three parameters:
| Key | Description |
|---|---|
id | The identification key of a Content Type, written in Camel Case. |
name | The name presented at the Headless CMS app. |
(optional) configurationSchemaSets | Creates a new tab on the page of that Content Type with advanced settings. In our example, the Custom Page includes a new tab called Settings with custom SEO settings. Check the following section for more information. |
The configurationSchemaSets property
Back to our example, notice that the Custom Page Content Type has the configurationSchemaSets definition.
The configurationSchemaSets prop creates a new tab at the Headless CMS for that Content Type with advanced settings.
For the Custom Page, a custom section named Settings, which allows editors to change the site metadata, was created.

Also, notice that the configurationSchemaSets object must contain a name, written in camel case, and configurations.
In its turn, the configurations object must include a name for identification, written in camel case, and a schema, written in JSON Schema v6 (opens in a new tab) - a description language for creating forms. The schema defines the structure of the form used by editors to submit data.
For more information on how to write a schema, check the JSON Schema Reference (opens in a new tab).
After editing the cms/content-types.json file, remember to save your changes and check them live:
- Access the VTEX Admin and go to Storefront > Headless CMS.
- Click on Create New and check the available Content Type options.
- Click on Custom Page to create a new Custom Page and check the Settings tab.
Step 3: Adding Sections to the Headless CMS
Now, let's make some of our front-end components available for editing at the Headless CMS by writing the content schemas that represent them.
These components are referred to as Sections, and to create them, you can follow the instructions provided in the guide Creating a new section. The guide offers detailed information on the process of creating Sections and integrating them into the Headless CMS for easy editing and management.
The schema property
The schema will always be unique for each of your Sections as they create the form that editors will use to submit data and change the content of a given React component.
Notice that you must always declare the following properties inside the schema object:
| Key | Description |
|---|---|
title | The name that identifies your component in the Headless CMS app. |
description | A brief description that helps editors understand the behavior of your component. |
type | The data type of your schema. Possible values are string (opens in a new tab), object (opens in a new tab), array (opens in a new tab), number (opens in a new tab), integer (opens in a new tab), boolean (opens in a new tab). |
Depending on the type of your schema, you may need to define particular fields related to your component structure. For example, for a schema of the object type, you'll need to determine properties that map key-value pairs. For a schema of the array type, you'll need to define the items of that array.
For more information on each property of a schema, check the JSON Schema Reference (opens in a new tab).
Using widgets
When defining your Section schema, you can also use the uiSchema (opens in a new tab) along with widgets (opens in a new tab) to specify which UI widget should be used to render a given field of your schema. Common widgets are draftjs-rich-text, image-uploader, and block-select.